How to Draw Minnie Mouse
Learning how
to draw Minnie Mouse is – I guess – one of the most "want to know how" to draw skills.
It doesn’t really matter which one would you start to draw with. So, choose your favorite one and just follow the tutorial.
BTW, did you know that Minnie Mouse was created in the year of 1928! Together with Mickey Mouse, both are to this day the most popular among Disney characters. Minnie was originally named: “Minerva Mouse”.
We shall begin step by step from the very simple and loose initial helplines. The very first and the most important step before you begin the drawing is a careful observation - as always.
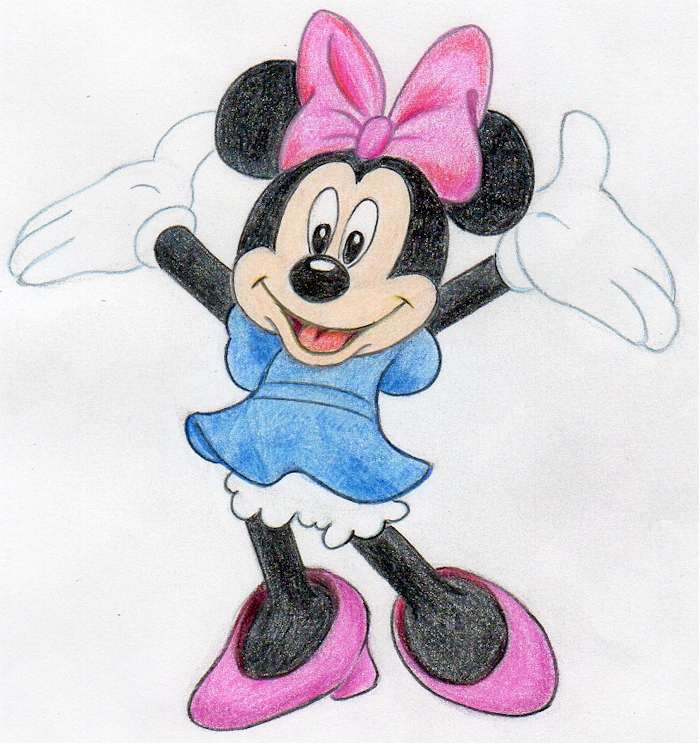
Click on the above picture to open it enlarged in a new window or tab. Observe as precisely as possible the proportions of the body posture, her pose, see how her legs and hands define the pose.
Drawing the Minnie Mouse, I would say, may not belong among the easiest cartoon drawings but if you follow this tutorial you will surely succeed. Then you can draw Minnie for someone and make a pleasant surprise. But the most important is that you will surprise yourself at first.
All these details are very important. Consciously train yourself to observe these details.
Let's Draw Minnie Mouse
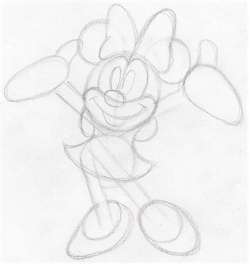
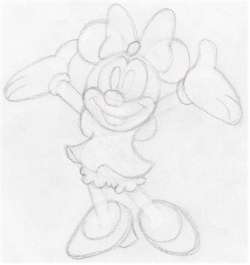
Sketch two circles approximately in the same or similar fashion as you see here. The upper circle represents Minnie’s head and the lower one her body - belly.
The upper circle is noticeably bigger than the lower one. This is important! Make sure the size balance between the two circles is approximately the same as in this picture so that the final drawing of your Minnie will look perfect and well-balanced.
In the beginning, always make the outline sketches lose. Later you can erase those initial pencil lines very easily if necessary.
Draw a center-guideline in the middle of her face. This round guideline will help you to proportionally balance both sides of Minnie’s face. Center help-line will especially help when you’ll decide the position of her eyes.
Let’s begin to outline her hands. Sketch a “V” – shape thing. The angle between the two hands should be approximately the same as you see here but is OK if you make the V-shape more open.
If possible, don’t make the angle smaller otherwise her hands and fingers might be hidden too much behind her head. Sketch Minnie’s legs as you see in the picture.
Notice that both legs start from the upper side of her body. Make the length of both - hands and legs, approximately the same as you see here.
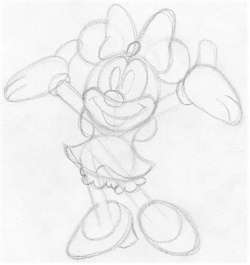
Most likely, you’ve already noticed that the process of how to draw Minnie Mouse is very simple. Sketch the ears.
The center guideline across Minnie’s face now comes very helpfully as you see. Outline the hands.
Both hands look like some oval uneven shapes. In a similar fashion outline both Minnie’s feet. Your Minnie Mouse begins to emerge from the shapeless mist of guidelines.
The ribbon on Minnie’s head has a shape of a butterfly. Sketch it similarly. It does not need to be the same in size or shape.
Outline the thumbs (daddy's fingers) on both hands. Now comes handy the center-line on the head.
Sketch both eyes and outline the smiling mouth. Both shoes outline the inner rim as you see in the picture.
You can
erase unnecessary pencil lines if you feel so. It’s good to use a pencil type eraser, if you have one handy because there are so many narrow spaces.
Gently outline the mouth, the nose, the eyes, and the silhouette of the clothes.
Continue sketching and outlining further details. Fingers, wrist band and the flounce on the skirt. Sketch the heel on her shoe.
Also, notice, there is a small brooch on the ribbon on Minnie’s head. Every detail counts so do not rush. Take your time.
This step especially comes in handy with the pencil-type eraser because we are going to erase unnecessary initial pencil lines to draw the final outline and make the final shape of Minnie.
After erasing the most of initial guidelines, you’ll suddenly realize that drawing Minnie Mouse is not that difficult at all.
It is because we started from scratch and have built layer upon layer.
Take a sharpened HB pencil and make a distinctive thin line over each original sketch. Then erase the rest of the initial pencil noise around it so you will get this clear picture of your Minnie Mouse.
You came here to learn how to draw Minnie Mouse but now you also have a cool Minnie Coloring Page that you can print out.
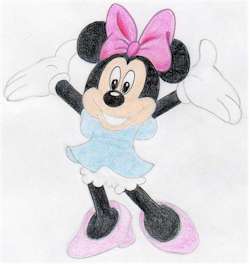
Begin to color the Minnie as you see in the picture. I recommend coloring black parts with a blue pencil first to get a good base color. Trust me, this method works quite well.
Just observe the sequence of coloring and do it similarly or better. Remember, this is not a fixed unchangeable way of coloring. I encourage you to always try or experiment with new ways of drawing or coloring.
However, if you are trying new color blends, I recommend doing it first on a separate piece of paper and then coloring your drawing because color pencils are difficult to erase completely.
Continue coloring as you see in the pic. Now, you can work out the eyes and color all black parts. Always leave a small tiny white spot on the pupil of the eye, that makes the eyes look alive.
A similar trick works for a small bright spot on tip of the nose. Do the same.
Finish coloring the ribbon, so that you can proceed with coloring the lower parts of Minnie.
This is the last step in how to draw Minnie Mouse tutorial. Observe well every detail on the picture, every shade on Minnie’s ribbon, on her clothes.
The inner part of Minnie’s mouth is colored as one of the last.
You can shade her hands and flounce her skirt (white parts) with a very weak sky-blue color. Blue color can create a very nice and soft type of shade. Experiment with it on a separate piece of paper.
And remember; ALWAYS do your best to make your drawing better than mine, because that is the purpose of this tutorial. You do not want to be a copy of me!
I would suggest you always do your best to be YOU because you are unique!
I hope you enjoyed this little draw Minnie Mouse lesson as I enjoyed creating this little tutorial for you.
Did You Enjoy Drawing Minnie Mouse?
Check Out Also These Disney Characters Tutorials:
 | |||
 |
 | ||
 |
 | ||
 | |||
 | |||
Visitors’ Personal Gallery Pages
Enjoy the collection of personal galleries below.
Observing others’ artwork is always inspiring and might spark new ideas for your own creations.
We believe you’ll have a lot of fun exploring these pages!
|
| |||
Theme Based Visitors Galleries
The following Theme Based Galleries are a collection of selected drawings from various authors based on a certain theme. I would like you to get as much inspiration as possible for your own drawings.
SHARE YOUR DRAWINGS
Select The Category and Follow The Uploading Instructions
Share your own drawings, sketches or doodles by choosing a suitable
category below. You will be guided to the uploading process step by
step.
Latest Visitor's Drawings
-
Life is a puzzle
Dec 24, 24 08:13 AM
Life is a puzzle. -
Mollie Brennan and her little sister grown up
Dec 24, 24 08:12 AM
This is my drawing of British girls Mollie Brennan and Debbie Brennan on Microsoft Paint. Debbie is now 14 years old and is ready to commence her life -
Destiny controls our life and times
Dec 24, 24 08:12 AM
Destiny controls our life and times. -
You got mail
Dec 13, 24 05:52 PM
I really been enjoying trying new things. This is acrylic paint on an old saw blade. I have not posted in a while so I will be sharing more soon -
Imaginary pen art completed
Dec 12, 24 05:44 AM
As for handleterring of NATURE and the decor,brillant pens were used.And it is good for this style.So here is an imaginary pens art and as usual,dominated -
Still in progress
Dec 08, 24 05:25 AM
Ballpoint pens art. Imaginary. -
Respect others for self-protection...
Dec 07, 24 07:59 PM
Respect others for self-protection... -
Thieves are always punished
Dec 07, 24 07:57 PM
Thieves are always punished. -
carnivorous plant
Nov 25, 24 08:02 AM
carnivorous plant -
Imaginary pens art in progress
Nov 25, 24 07:59 AM
Dominated by colourful nature and focus on details. -
Chateau Trompette in Mauritius
Nov 25, 24 07:57 AM
Maybe this colonial mansion is not known to many, in Mauritius. Or maybe of all those who saw it, very few are aware that it is known as Chateau Trompette. -
Understand your own value
Nov 25, 24 07:55 AM
Understand your own value -
Be your own hero
Nov 09, 24 07:00 AM
Be your own hero. -
Place of tranquility
Nov 03, 24 04:00 AM
Imaginary pens art. Normal ball pens were used except for yellow colour done with a gel ink one. A place of tranquility dominated by nature. Even if in -
Inspired by lake Venna of India
Oct 29, 24 11:32 PM
Here is an imaginary pens art showing the atmosphere of Lake Venna which is located in Maharashtra in India.
