Rose Sketch
Want to make a rose sketch? Want to make a rose sketch? This simple exercise shows you step by step how to do it. It does not matter what shape of a rose you sketch.
The important thing is, as always, that you begin to sketch.
You’ll see to your amazement how it evolves before your eyes, almost magically.
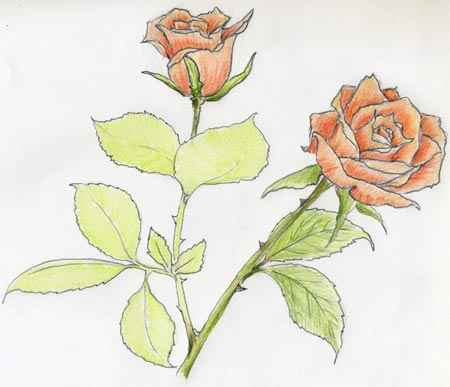
This sketch of a rose is only half baked…well…half done, purposely, but only the coloring part.
Let's Enjoy This Rose Sketch
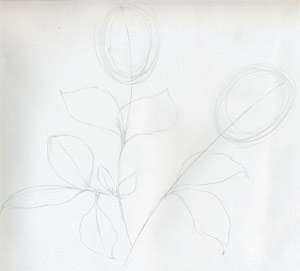
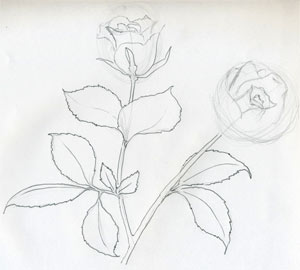
In one single pencil line – if possible - sketch the stems. You decide if it’s straight or slightly curved.
On both ends sketch an egg-like shape circle. That will be the flower head. The size doesn’t matter yet.
Outline the shape of the leaves. Avoid using an eraser if possible.
So far almost all pencil strokes of this rose sketch (if we can call it that way) were only single pencil lines.
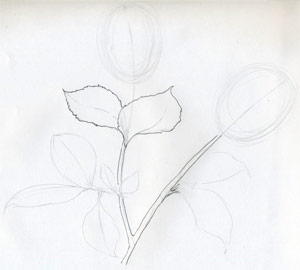
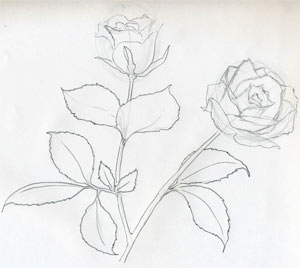
Now we’ll begin to work out the details and outline the final shape of the flower.
Continue shaping the stem, the leaves and begin to sketch the head of one of the roses.
Do not mind if the shapes are not the same as you wish…it’s only a sketch.
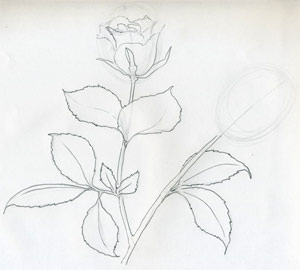
The right head is opened more so it looks naturally wider and more round.
You can begin to sketch the opened rose head from any corner you feel comfortable with.
But if you are not sure begin to sketch from the center. Check out the page about how to draw a rose for more detailed explanation.
Notice how many pencil lines I made on both rose heads. Do not be afraid to make as many pencil lines as necessary. You can always erase them later.
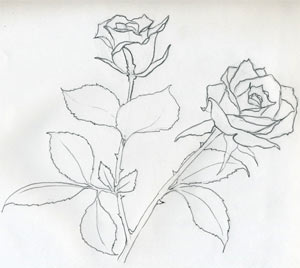
Outline the contours of the petals, the stems, and the leaves and erase the rest.
Now, you have a simple rose sketch – a coloring template to color or print out as you wish.
Here comes the (relatively) easy part. You have successfully captured the basic shape.
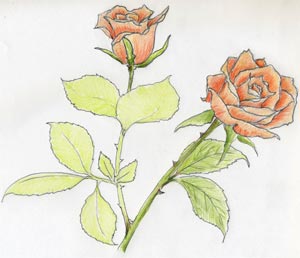
Pick an orange color and color both flower heads. No shading just a simple flat coloring all over the petals.
This is a rose sketch, so make your color pencil strokes rather rough and quick, e.i., do not work out every corner too precisely.
The point is, you have to work quickly as if someone would be already waiting for your sketch outside. The keyword is speed.
Take a bright red color pencil and gently color the petals the same way as in the previous step.
No shading yet, just flat coloring. Push the pencil gently!
Roughly shade the petals with a darker red color pencil. Enlarge the image and see which parts are darker, so you'll get the idea.
When ready, color the stems and the leaves with light green. Again, flat coloring all over. You are creating the base for the next darker green layer.
The last step (not really) is: adding more darker green tonal value to the stems.
Notice that the thorns contain a little dark red color.
If you sketch or draw living things, plants, animals, or people, you’ll see that every color is a blend of at least two colors or more.
Only half of this rose sketch is finished. Please color the rest of the green part and you can submit your sketch if you feel like to.
Visitors’ Personal Gallery Pages
Enjoy the collection of personal galleries below.
Observing others’ artwork is always inspiring and might spark new ideas for your own creations.
We believe you’ll have a lot of fun exploring these pages!
|
| |||
Theme Based Visitors Galleries
The following Theme Based Galleries are a collection of selected drawings from various authors based on a certain theme. I would like you to get as much inspiration as possible for your own drawings.
SHARE YOUR DRAWINGS
Select The Category and Follow The Uploading Instructions
Share your own drawings, sketches or doodles by choosing a suitable
category below. You will be guided to the uploading process step by
step.
Latest Visitor's Drawings
-
You got mail
Dec 13, 24 05:52 PM
I really been enjoying trying new things. This is acrylic paint on an old saw blade. I have not posted in a while so I will be sharing more soon -
Imaginary pen art completed
Dec 12, 24 05:44 AM
As for handleterring of NATURE and the decor,brillant pens were used.And it is good for this style.So here is an imaginary pens art and as usual,dominated -
Still in progress
Dec 08, 24 05:25 AM
Ballpoint pens art. Imaginary. -
Respect others for self-protection...
Dec 07, 24 07:59 PM
Respect others for self-protection... -
Thieves are always punished
Dec 07, 24 07:57 PM
Thieves are always punished. -
carnivorous plant
Nov 25, 24 08:02 AM
carnivorous plant -
Imaginary pens art in progress
Nov 25, 24 07:59 AM
Dominated by colourful nature and focus on details. -
Chateau Trompette in Mauritius
Nov 25, 24 07:57 AM
Maybe this colonial mansion is not known to many, in Mauritius. Or maybe of all those who saw it, very few are aware that it is known as Chateau Trompette. -
Understand your own value
Nov 25, 24 07:55 AM
Understand your own value -
Be your own hero
Nov 09, 24 07:00 AM
Be your own hero. -
Place of tranquility
Nov 03, 24 04:00 AM
Imaginary pens art. Normal ball pens were used except for yellow colour done with a gel ink one. A place of tranquility dominated by nature. Even if in -
Inspired by lake Venna of India
Oct 29, 24 11:32 PM
Here is an imaginary pens art showing the atmosphere of Lake Venna which is located in Maharashtra in India. -
Birds can fly, why can't I?
Oct 29, 24 11:31 PM
Birds can fly, why can't I? -
Boy vs girl, who is the best?
Oct 29, 24 11:30 PM
Just half a girl and half a boy -
Cyclone
Oct 29, 24 11:29 PM
Cyclone


