How to Draw Bambi
Let's learn how to draw Bambi, one of the cutest Disney Characters. Did you know that the original Bambi storybook - Bambi, a Life in The Woods - was written by the Austrian author Felix Salter in 1923?
It seems that the vast majority of the most beautiful fairy tales or bedtime stories for children were written nearly 100 years ago or even earlier. Life was different then, time has seemingly passed much slower than now.
In this tutorial, I show you how to draw Bambi characters in a few simple and easy-to-follow steps.
If possible, use a standard HB graphite pencil and paper. Have handy an eraser and a pencil sharpener too.
All techniques on this website are basically the same, using the same or very similar drawing sequence.
Drawing Bambi may not necessarily be one of the simplest drawings, so some parts may be a bit challenging.
But go ahead, grab the pencil and let’s learn how to draw Bambi today.
Let's Learn How To Draw Bambi
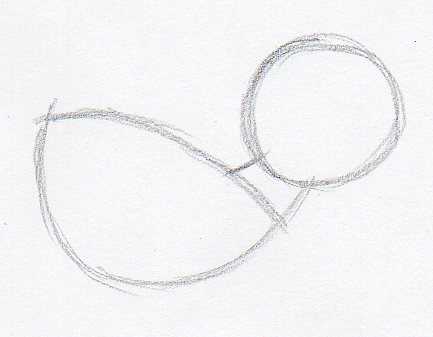
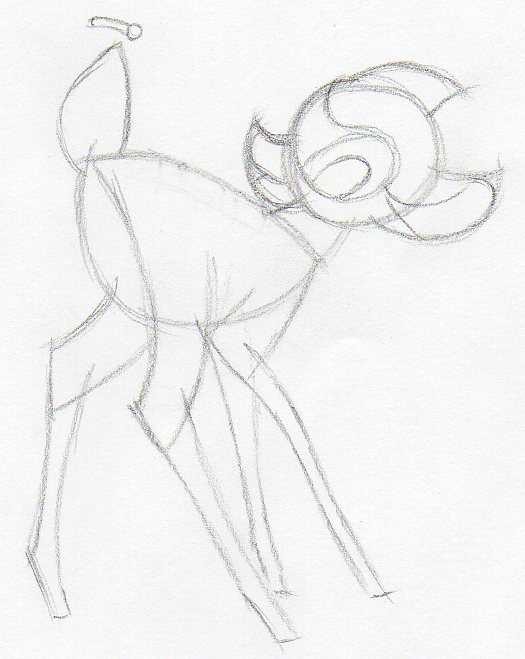
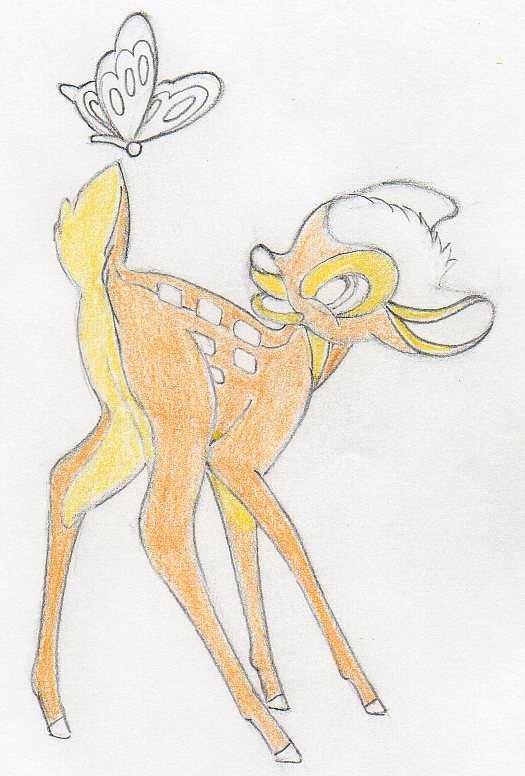
First, outline the basic shape of Bambi's body, neck, and head. Draw approximately the same shape as you see in this pic.
Make very light pencil strokes do not push the pencil, you will need to erase these pencil guidelines later.
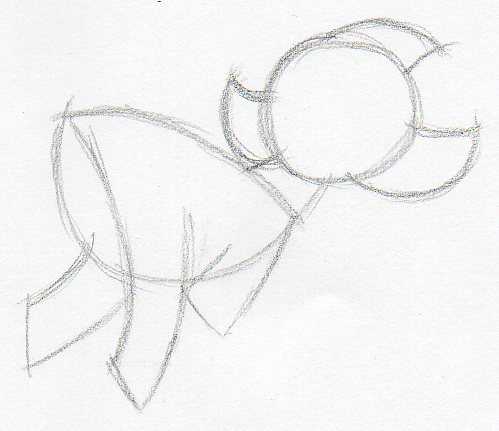
Make a rough sketch of Bambi's ears, nose, and the upper part of the legs.
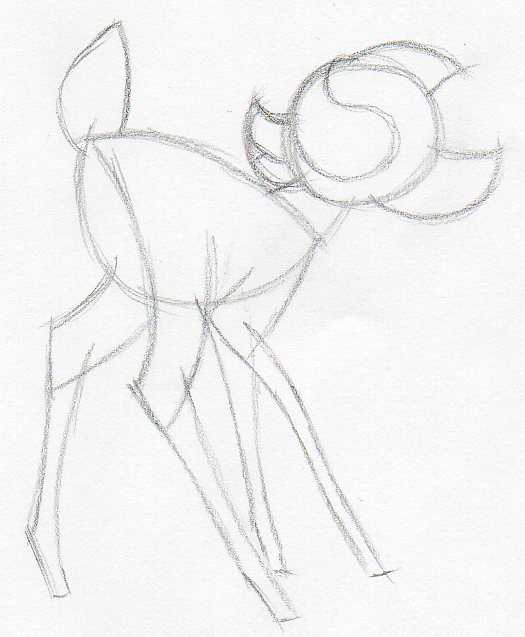
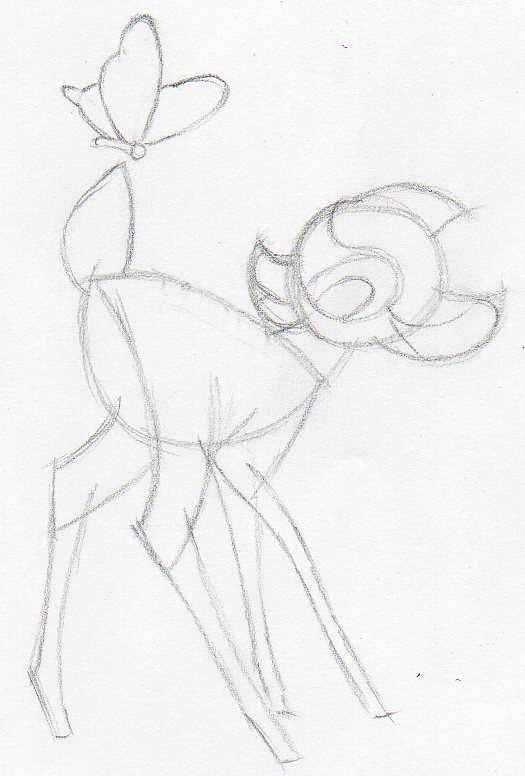
Add the tail and the lower half of the legs. Just sketch out the legs very roughly, you don't need to focus on tiny details at the moment.
The only thing you should be careful of is the overall proportional balance of each of the body parts.
This is the part when I said that learning how to draw Bambi may not be necessarily the easiest tutorial. Anyway, you are here already so let's continue.
Outline the white part around the eyes and the mouth opening.
Approximately outline the eyes and the brighter (inner) part of the ears.
Begin sketching the body of the butterfly sitting on Bambi's tail.
Add the butterfly's wings
Now, let's refine this rough basic sketch.
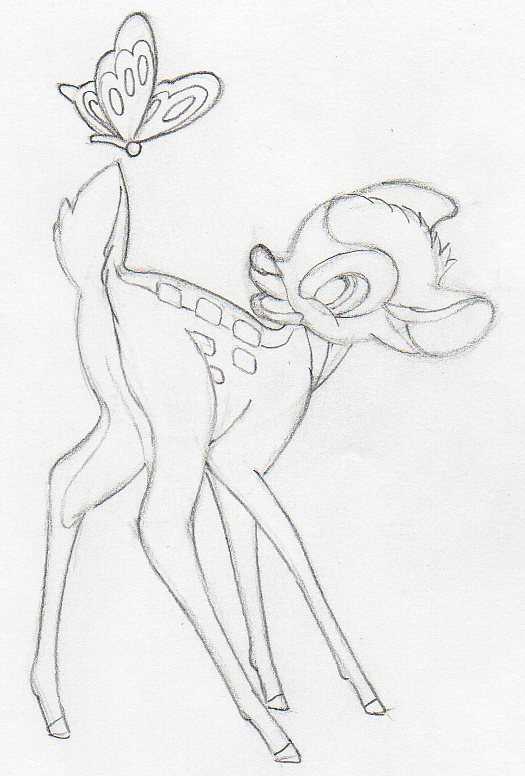
Erase the initial pencil guidelines that are no more necessary now and are becoming obstructive. Bambi is gradually getting a realistic shape.
Begin outlining the details on Bambi’s head, mouth, eyes, and ears. Sketch out the white dots on its back, and so on. Observe well the picture and sketch it out in a similar way.
Now you can also clearly outline the distinct lines on the butterfly’s wings and butterfly’s body.
When you complete this stage you suddenly realize that you now know how to draw Bambi. You have completed the clear basic outlines of Bambi’s body and the butterfly above the tail.
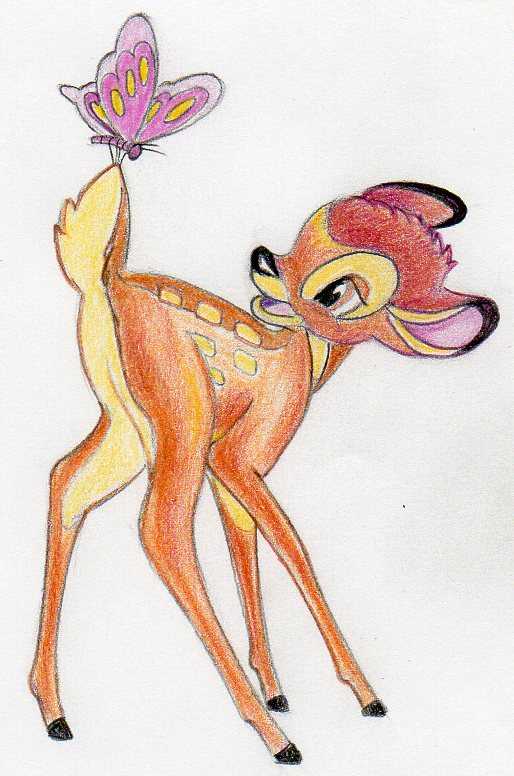
You have finished the basic outlines of Bambi’s body and the butterfly above the tail. Now you have a Bambi coloring page sheet.
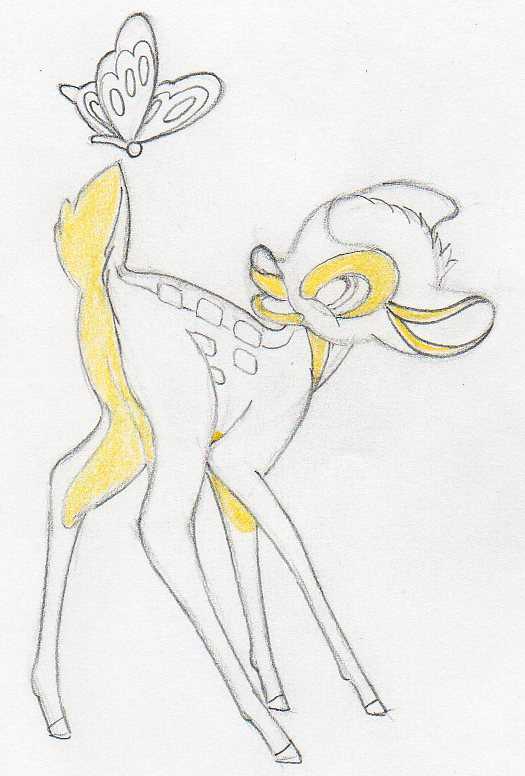
From this step on, you are going to color Bambi. Coloring is a process where you have to gradually put color layers on each other. You will begin using the lightest color and gradually put other layers of darker color tones on each other.
First, color out the brighter parts under Bambi’s tail, belly, and area around eyes and ears. Observe the picture well and make it similar or better.
Now you gradually color the main part of Bambi’s body, the back, the legs, etc as you see in this picture.
Add another layer or layers (as necessary) of brown and purple color. Observe the picture precisely and similarly make the coloring.
We all would love to see your Bambi drawing when ready. Important and cool detail: notice how all butterfly’s legs are concentrated on one single spot on the tip of Bambi’s tail.
I am so excited you’ve learned how to draw Bambi. Please upload your drawing and share your work with us. We’d love to see it.
Click on the banner below and upload your artwork.
Did You Enjoy Drawing Bambi?
Check Out Also These Disney Character Tutorials:
 | |||
 |
 | ||
 |
 | ||
 |
 | ||
Visitors Personal Gallery Pages
Please see and enjoy the following collection of personal galleries. We all believe you will have a lot of fun. Observing others’ artwork is always, always very inspirational. You may get some new ideas for your own drawings.
|
| |||
Theme Based Visitors Galleries
The following Theme Based Galleries are a collection of selected drawings from various authors based on a certain theme. I would like you to get as much inspiration as possible for your own drawings.
And Now It's Your Turn
SHARE YOUR DRAWINGS
Select The Category and Follow The Uploading Instructions
Share your own drawings, sketches or doodles by choosing a suitable
category below. You will be guided to the uploading process step by
step.
Latest Visitor's Drawings
-
Be your own hero
Nov 09, 24 07:00 AM
Be your own hero. -
Place of tranquility
Nov 03, 24 04:00 AM
Imaginary pens art. Normal ball pens were used except for yellow colour done with a gel ink one. A place of tranquility dominated by nature. Even if in -
Inspired by lake Venna of India
Oct 29, 24 11:32 PM
Here is an imaginary pens art showing the atmosphere of Lake Venna which is located in Maharashtra in India. -
Birds can fly, why can't I?
Oct 29, 24 11:31 PM
Birds can fly, why can't I? -
Boy vs girl, who is the best?
Oct 29, 24 11:30 PM
Just half a girl and half a boy -
Cyclone
Oct 29, 24 11:29 PM
Cyclone -
Imaginary pen art: lake, house and nature
Oct 26, 24 07:51 AM
Two ballpoint pens were used:Nataraj 1.0mm and that of 0.7mm. Dominated by nature, a lake is partly visible on the left and that of a house on the right -
Don't give up, try and try
Oct 19, 24 06:20 AM
Don't give up, try and try. -
Johnny, Mollie and Matt go at a pop party
Oct 18, 24 08:44 PM
This is my drawing of Johnny, Mollie and Matt on Microsoft Paint. 32 year old British man Johnny Mills, his girlfriend/wife Mollie Mills (21 years old) -
Imaginary pens art
Oct 14, 24 05:50 PM
A view on dense forest, with ballpoint pens art. -
no pain no gain
Oct 07, 24 06:55 AM
no pain no gain -
Sorry Mom (by Sana♡,Calcutta)
Sep 28, 24 09:02 PM
Sorry for being a useless child mother..I am trying to be perfect like them..YOU say a ton of hurtful words to me every day..I know it's because you want -
Imaginary pens art
Sep 28, 24 08:49 PM
I have always been fascinated by nature. A place where there is silence and pure air and you can forget your stress for some time. Here is an imaginary -
clock stops time never
Sep 28, 24 08:46 PM
clock stops time never -
Don't beg, sell flowers
Sep 21, 24 11:35 PM
Don't beg, sell flowers.

